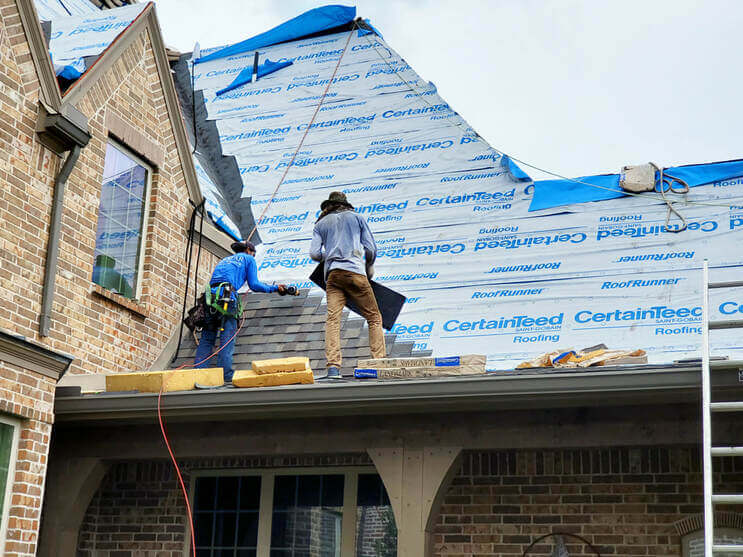
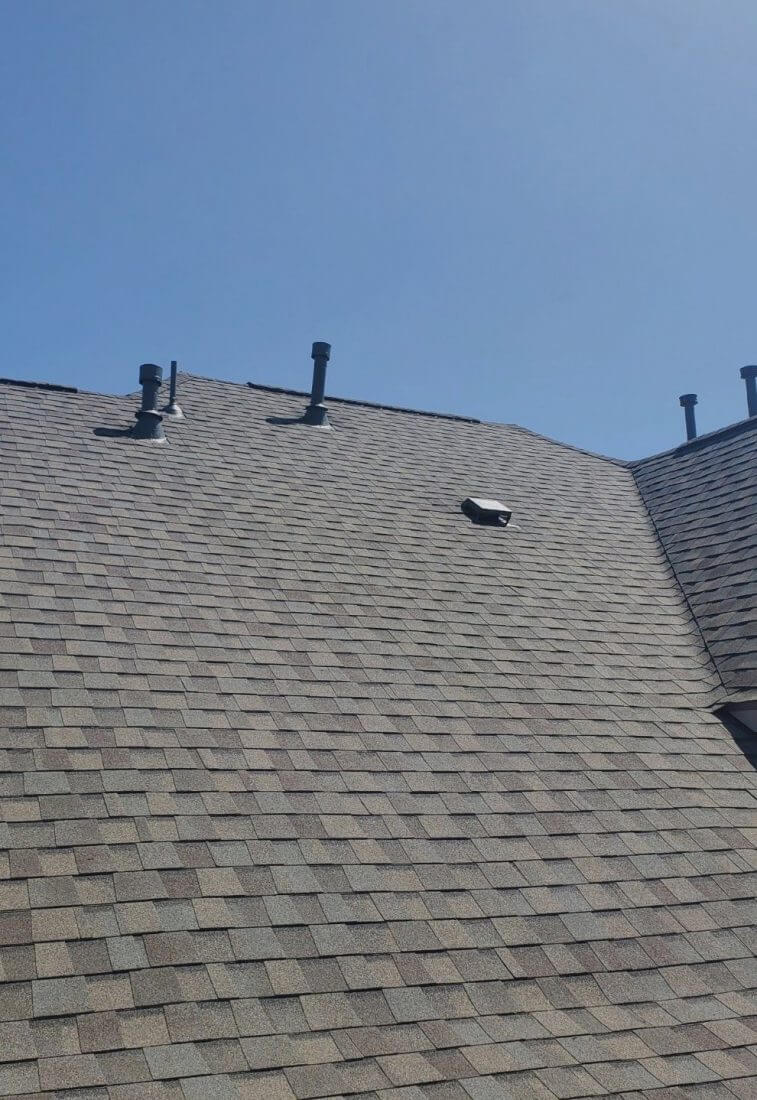
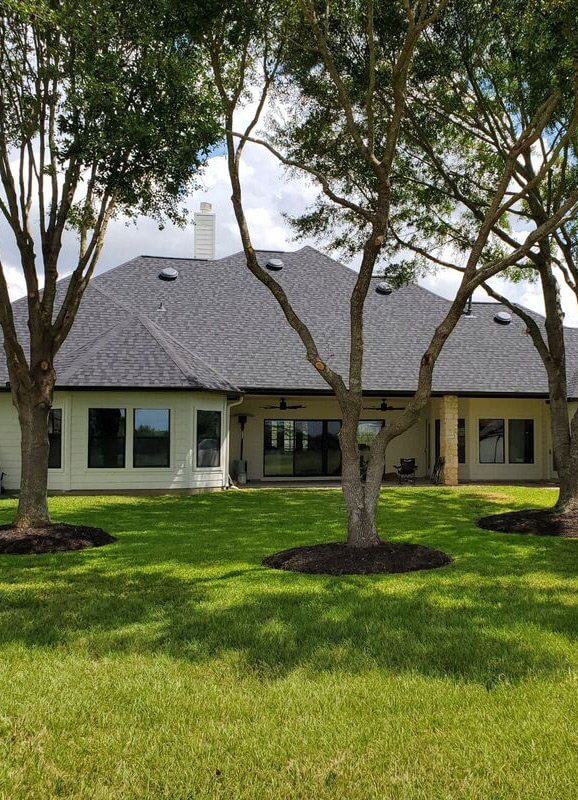
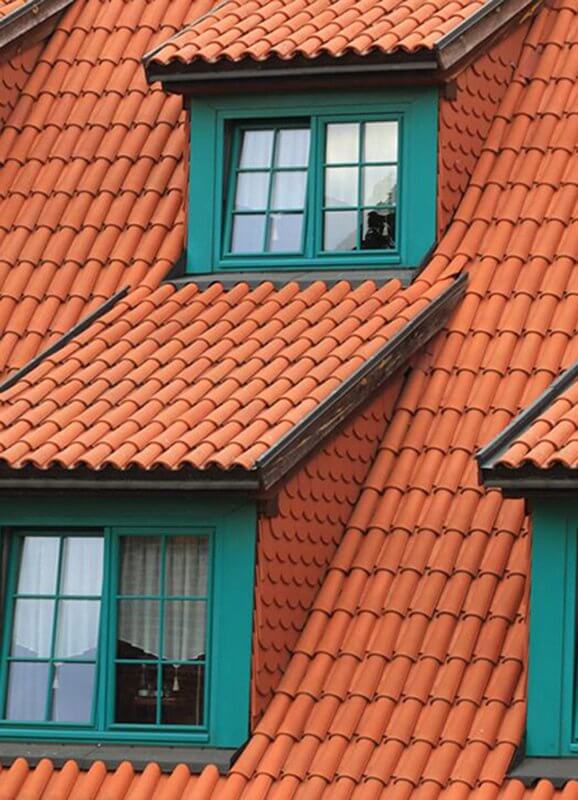
There was a severe storm that hit your area. Your house was pummeled with hail, or maybe a very strong wind. Or perhaps it wasn’t a storm, but an electrical attic fire, or a large branch damaged your roof. Suddenly, you’re faced with navigating the insurance claim process. ✓ Will the damage be covered? There is unfortunately, not just one answer. It depends on the insurance policy you purchased and other factors. But, don’t despair. This short article will help you sort out some good things to do and when. Brace yourself though, the claim and repair process will take time. Most importantly though, don’t just ignore your damaged roof! Start with a quick read of our previous article about storm damage and the steps to take. If you received severe damage, get some temporary weather protection over the damage until full repairs are underway. Remember – take photos and save all receipts – you will need them as proof later! Watch out for scams from “storm chasers” that might show up at your door offering quick roof repairs. Read more about their scam tactic in our other article. Next, dig out your insurance policy and make notes about your coverage. Your policy terms will determine what happens regarding your claim.
✓ What’s your policy number?
RCV or ACV dramatically affect the amount of money you are going to get! ✓ RCV stands for REPLACEMENT CASH VALUE. Your policy will pay to fix the damage using similar materials minus the amount of your deductible. Your roof has been damaged, you’ve reviewed your policy, an insurance claim needs filed, but most importantly you need your roof fixed. This short 9-step guide gives you clear steps and useful information about the claim and repair process.
Documentation: Take photos and make written notes. If you hire a roofing contractor, check out our article on selecting the right one. Watch out for free inspections that commit you to only working with that contractor. Select a contractor prior to meeting with your insurance company, and one who has insurance claims expertise. Involve them in the claim process.
Notify Insurance: Get your policy notes out. Call the claims number and report the damage. The insurance company will arrange to have an Adjuster come out to inspect the damage.
Call the Contractor: It’s helpful to have the roofing contractor meet the Adjuster also. The Adjuster may not know local building codes. A good contractor can discuss details with the Adjuster so all needed repairs are identified. Direct communication between the Adjuster and contractor can remove you from being in the middle.
Meeting the Adjuster: Even if your contactor is there, have your documented damage and inspection report on hand to ensure everything damaged is included.
Insurance Money: Insurance will likely mail a check, but not for the full cost. Your deductible amount (and any ACV depreciation) will be deducted. If you have a mortgage company their name may be on the check also. Call the mortgage company and find out their procedure so you can cash the check.
Repair Deposit: Transfer the required funds to the contractor.. Confirm the date they will begin your repairs.
Additional Damage: If the contractor discovers hidden damage, call your insurance company and communicate this and the additional cost. The Adjuster may return to inspect it. Get written confirmation the insurance agrees to the increase before giving the contractor the green-light.
Repairs Completed: Once the repair work has been finished forward the contractor’s final billing to your insurance company.
Final Payment: The insurance company will issue their final payment, but the arrangements you made with the contractor determines that deadline. With your final payment, remember to get a “paid” receipt along with any warranties they provided.
What about pocketing the insurance money if the damage isn’t that bad? If you take the initial insurance funds and cancel the repair work, several things will happen. The final payment won’t be sent. Your roof, and any other damages related to it, will no longer be insured. Later, if you want to repair the roof, no insurance claim can be made. A damaged house will not qualify as collateral for most loans. If you try to sell the property, it will fail the buyer’s loan inspection. The value of the house will often be reduced more than the repair would have cost. The best financial decision is to use the insurance money to repair the damage. Roof repair and an insurance claim is an important process and you can avoid the pit-falls. Remember this guide in your roofing repair project to be prepared and informed.
✓ How much will they pay?
✓ How do I file a claim?
✓ Is there a claims phone number?
✓ Deductible: is it a percentage or dollar amount?
✓ Exclusions: are certain events not covered?
✓ Limits: what repairs have caps?
✓ Note deadline for filing a claim.
✓ Loss of Use: payment if your home is unlivable.✓
✓ ACV or RCV?
✓ ACV stands for ACTUAL CASH VALUE. If your roof’s lifespan was 20 years and it’s 10 years old, then 50% of its lifespan is gone. Insurance will pay 50% of the repairs after subtracting your deductible.
NOTE: If you believe the Adjuster isn’t accurate in what they approved for damages and costs, you can hire public adjusters to assess the damage and produce an independent report.
NOTE: Communicate with the roofing contractor regularly so your project stays on their work schedule
Roofing Tips
Storm Damage & Storm Chasers | 5 Tips, 8 Action Steps & 5 Warnings
We have 5 tips for severe weather preparation for your home and family!
– and then 8 action steps after a severe storm has hit + 5 warning signs to avoid storm chasers.
Severe weather happens in all parts of our country. The roof is your home’s protection against these powerful forces of nature. Your region likely produces a certain type of severe weather that could result in roof damage. Maybe it’s hail, wind, ice or broken tree limbs. These 5 preparation tips could avert even more serious outcomes for your family and home.

Tip #1 – Severe Weather Family-Plan
Make a plan, put it in writing and make sure everyone knows it. Identify a meeting place if the home gets damaged. Select a contact person, outside your area, in case local phone service is down so family members can locate each other.

Tip #2 – Emergency Kits
Prepare a kit for each person that contains: flashlight, radio, batteries, essential medicines, first-aid kit, nonperishable food, bottled water, clothes, cash and a copy of the emergency plan.

Tip #3 – Tree Trimming
Trees pose potential severe damage in ice and wind storms. Branches near your roof should be pruned. Consider removing any trees that high winds might blow onto your roof.

Tip #4 – Clear Gutters
Leaves and other debris can build up in gutters blocking drainage. Standing water can create serious roof problems. Set a schedule to check and clean gutters, especially after the fall season.

Tip #5 – Property Preparation
Secure or remove items that high winds could turn into projectiles damaging your home or causing injuries.
Check out the National Storm Damage Center for lots more helpful information.

If you think something may have damaged your roof, here are common signs to look for:
✓ Missing shingles
✓ Gaps in flashing
✓ Dented shingles
✓ Cracked/broken shingles
✓ Loose granules
✓ Dented vents
We published a roof inspection article you might find helpful. Arranging a professional inspection can reduce your concerns and often is free. If a severe storm has unfortunately hit your home, what’s next?
Here are some immediate action-items that can answer concerning questions about your roof. They can assist you in determining if contacting a roofing professional would be advisable.
✓ Start on the ground checking for roof damage. What? Small pieces of shingles can be torn off by the storm and left lying in the yard. After heavy hail, check near gutter downspouts for shingle granules.
What’s up with granules? Keep reading to find out!
✓ You found damage. Take some photos! Document any damage you find in case you need it later to show insurance or your roofing contractor.
✓ Some damage can be seen from the ground. Look for missing or out-of-place shingles from various angles in your yard. (or from upper-story windows)
✓ Are any tree limbs on your roof? Before removing them, note their location for later close inspection of the area. If the branch is large or still partially attached, consider hiring a professional, since heavy wood and a steep roof is a dangerous combination.
✓ Was it a hail storm? Hail can dent your shingles without creating a visible hole. That may not seem serious, but a severe dent can cause a crack which allows water to later penetrate.
✓ Hail! Yes, it can also damage just the shingle surface causing the granules to detach. If enough granules come off, it will shorten the lifespan of the shingles. Check in your roof gutters to see if there are lots of granules.
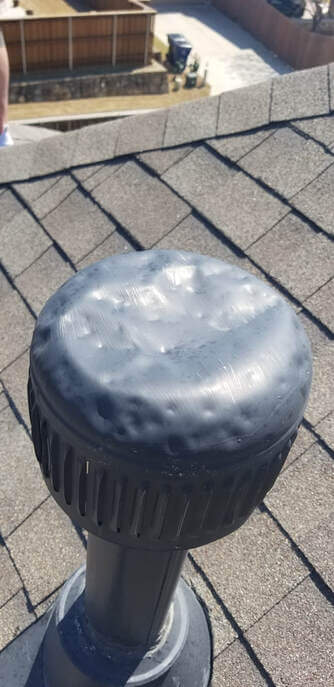
✓ Your roof has vents, which are typically a thin metal. Check if they are lying flat and sealed to the surrounding shingles. If they are severely dented and deformed, they might leak.
✓ Flashing is the flat metal sealing the roof to a wall or chimney and in the bottom of valleys. Has hail or strong wind pulled it away and broken the seal? If it is gapped or bent, then water will likely be able to get in at that point.
✓ Shingles – These are overlapping rows of material, sealed together, blocking the outside weather. They are most likely made from asphalt and fiberglass. If the rows of shingles have become unsealed due to age, damage or a sagging roof deck, they may become unable to stop moisture penetrating.
Owens Corning has produced a helpful storm damage guide.

Don’t Get Scammed by STORM-CHASERS
Have you watched videos of “storm-chasers” getting close up shots of tornados? Scary stuff! Most people want to avoid tornadoes.
But there is another kind of “storm-chaser” and you need to avoid them. These are individuals who follow severe storms and offer quick roof repairs to unsuspecting homeowners.
They have a great sales pitch about little or no cost to you, or eliminating your insurance deductible, or claiming being sent by your insurance company. Some will make an inspection, identify damage, ask for a deposit, but then never return. Or, they may accept your payment and do the work promising insurance will reimburse you, but using cheap materials and doing shoddy workmanship.
If a roofing contractor comes to your home:
✓ and you didn’t call them…
✓ if they use high-pressure sales tactics…
✓ if they want a quick decision…
✓ if they ask for pre-payment…
✓ if they promise insurance claim reimbursements…
Don’t sign! Don’t agree on the spot! Take some time and…
✓ Ask for their business license or certification
✓ Call your insurance company
✓ Check with the Better Business Bureau
Find out if they are a legitimate business with a good reputation. Check out our article on how to choose a quality roofing contractor.
Severe weather and storm damage are stressful events. Prepare with these tips beforehand.
Implement these steps after a storm to get back to normal as quickly and smoothly as possible.
Re-Roofing Guide – How to Know When – Steps in the Project
Do you have a leaky roof? Maybe not, but you’ve noticed some shingles are starting to curl. Have you noticed a sag in the shape of your roof? Are the shingles on your roof are nearing their expected lifespan?
Maybe you’re thinking it’s time to stop ignoring your roof? Should you just repair parts of it? Do you need a completely new roof? How to know what is best to do?
Here is brief tutorial about the system that is your roof and some important steps to a successful re-roofing project.
Your Roof is Actually a SYSTEM
Your roof is a lot more than just the shingles that can be seen while standing in your yard. The shingles may take the brunt of the weather, but they are backed up and supported by several other components. If one of those parts begins to fail it can cause problems with the others. On the other hand, one part might need replaced and the other parts have a long-life of service left. Let’s consider 3 parts of your roof’s system.

Roof Deck – These are 4×8 foot wood sheets nailed to the house’s trusses. It might be plywood or more likely OSB (oriented strand board). If the sheets have gotten wet, they can begin to sag or rot. The moisture could have come from outside, leaking through the shingles, or from inside humidity building up due to poor ventilation. You can read about inspecting your roof’s ventilation system in our article here. If the roof deck is deteriorating it will lead to failure of the shingles.

Shingles – These are overlapping rows of material, sealed together, blocking the outside weather. They are most likely made from asphalt and fiberglass. If the rows of shingles have become unsealed due to age, damage or a sagging roof deck, they may become unable to stop moisture penetrating.

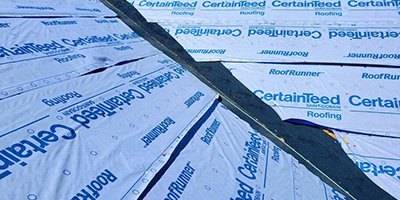
Underlayment – This can also be called roof-felt, tar-paper, or sub-roofing. Typically, this is a 3-foot wide roll of waterproof material applied on top of the roof deck and under the shingles. This layer serves as a second barrier to outside moisture penetrating the roof. This layer usually isn’t damaged unless the layer above or below it becomes damaged. If the shingles need to be removed and replaced, the underlayment must also be replaced.
Repair or Re-Place?
Getting several opinions from professional roofing contractors is likely the best method in determining the answer to this question. There are some important questions you should ask the roofing contractors after they’ve made their inspection, if the information isn’t in their report.
✓ What do you estimate the roof’s remaining life to be in its current state?
✓ What needs to be done if I just had repairs made?
✓ After repairs, what would be my roof’s expected lifespan?
✓ What is the cost for repairs?
✓ What is the cost to replace the roof?
Knowing the cost of different options and comparing those with the estimated lifespan of the roof, a decision to repair or re-place might become clear. Regardless of which option is chosen, here are 3 steps for your project to help avoid problems and smooth the process:

#1 – Select and hire a good Roofing Contractor
We recommend following the steps in our previous article about selecting the best roofing contractor. This is the most important step to get right. A local contractor with good reviews that is licensed, insured and experienced will contribute more to a successful project than anything else.

#2 – Select the right Roofing Materials
Another previous article we’ve written about different roof types would be helpful in this decision. If you are re-roofing you could consider changing to a different type material, such as metal, composite or wood. If you have decided to use an asphalt shingle, check out our article reviewing manufacturers and the differences in their asphalt shingle lines. There are many options from which to select regarding styles, prices, colors, lifespans and warranties.

#3 – Preparing your family and your property
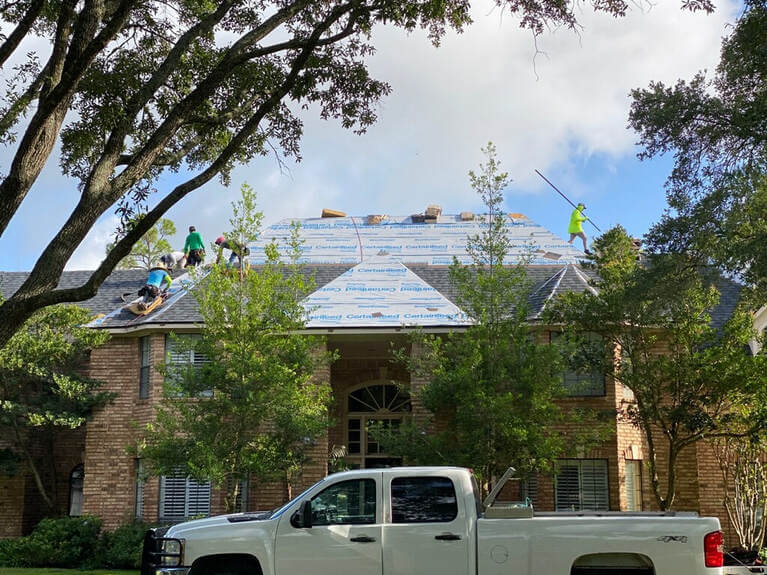
Especially if you are re-roofing, the project will be messy, hectic and dangerous. There will be numerous workers, vehicles and materials around your house and up on the roof. All the old roofing shingles and underlayment will be removed off the roof and new materials brought in and loaded on to the roof. Items in your yard and around the house should be removed to provide access and avoid them being damaged. Young kids and pets need to be kept out of the yard during the work. Older kids and adults need to be warned of materials unexpectedly falling off the roof, vehicles coming and going, and workmen being on the property.
Re-roofing is a big and costly project and shouldn’t be left to just anyone. We hope you now understand more about your home’s system that protects you from the weather that we just call a “roof”. With a bit of understanding you should be able to make a more informed and wise decision about re-roofing.
Ventilation – Critical to Your Roof’s Long Boring Life
Ventilation – A Critical Factor in Your Roof’s Long Boring Life
Your roof may not be given a second thought, that is until it has a problem. Your roof though, is much more than just the shingles you see from the street. A quality roof is actually an engineered system with many important components. If it has been designed well with quality materials, it can last decades. One aspect of design, that may not come to mind, is ventilation.
A properly functioning ventilation system may contribute the most to the lifespan of your roof. Without proper ventilation the other materials in your roof system will deteriorate more quickly and fail.
Passive Air? What is that?
Ventilation in most residential structures is a passive air-movement system in the attic. This simply means there are no powered fans or other equipment used to move the air. So, how is air-movement achieved? Why is it important?
Let’s begin with some reasons why air-movement in your attic is important.
✓ It keeps humid air inside the home from building up
✓ It reduces mold, mildew, or dry-rot from forming on the roof’s wood structure
✓ It lessens the heat buildup inside the attic lowering A/C bills
✓ It balances the amount of air going in-out
✓ It equalizes the temperatures endured by the roof
✓ It helps exhaust air-particulates created by activities inside the house

How does air move without fans?
The design works from the simple principle that hot air rises. Roofs are designed in many styles and shapes, so the design of the ventilation system also varies. Exhaust vents, often made from galvanized metal, penetrate the roof near its highest peaks, or along the ridge-crest, or in a gable-wall. Additional intake vents are installed in the lower parts of the roof, typically under the eaves or soffit. As the temperature of the air in the attic increases, the air rises and exits the attic through the high vents. That in turn draws air, which is cooler, in through the lower vents. The system, in this way, eliminates the need for powered fans to move the air in the attic.
4 Gallons Dumped in Your Attic Every Day!
Constantly bringing in cooler air balances the pressure, reduces temperatures, and exhausts hot-moist air. A typical family can generate upwards of 4 gallons of water-vapor per day from normal activities of cooking, showering, breathing, and cleaning. On cooler days when the attic air doesn’t get as hot, the air movement is naturally reduced without monitoring or equipment. In cold climates this air movement, keeps the roof’s temperature about the same as the outside air temperature, which reduces snow melting and then later ice forming. Ice buildup from poor ventilation can damage shingles and create leaks.
How Much is Necessary?
Roofing professionals are trained to know the amount of venting necessary based on the size of the roof and its design. They can suggest different types designed to blend into the color and style of your roof. In some situations, passive vents which are opened/closed by a thermostat are used. Sometimes powered fan vents can be best.
More Isn’t Always Better
Mixing different types of vents into the roof system can be a problem though. Air needs to move in from the lowest vents up and out through the highest vents. Introducing additional gable vents or roof deck vents has the potential to alter that flow pattern and create areas of stagnant air. These stagnant areas can allow humidity buildup and problems.
Maintenance Needed or Not?
Visual inspections of the attic area can point to ventilation problems if one knows the signs.
✓ Compressed and damp insulation
✓ Rusty nail heads
✓ Stains or discoloration on wood surfaces
✓ Mold and mildew.
Since the high vents must penetrate the roof, this becomes a weak point where water can find its way into the attic. Damage to the metal vents from large hail or high winds cause leaks. The vents also must keep out insects, birds and small animals using internal screens. Damage may not result in a water leak, but the screen could be ruptured. Repairs or replacement of damaged vents is quite simple and quick.

Lower intake vents often are connected to tubes or ducts that keep the attic’s insulation from falling into the vent stopping air movement. These ducts should be inspected occasionally to ensure they are still in place and functioning. If they have become dislodged or pinched, air movement is restricted.
Thermostatically controlled vents or powered exhaust vents should be inspected more often than the passive vents to ensure the equipment is in good working order.
Warranty Voided! What?

The shingles on your roof likely came with a warranty. This warranty can be void if the roof’s design does not properly ventilate or if the ventilation system has stopped functioning and hasn’t been repaired.
If your home is older, it is more susceptible to having a poor ventilation design or lack of maintenance may have reduced air flow. Fall is a good season to inspect your roof’s ventilation or have a professional take a look. We hope this information is useful for you to keep your home’s roof well-maintained and trouble-free.
Asphalt Shingles – Composition, Performance, Designs
ASPHALT SHINGLES: Designs, Performance and Popular Brands
In our last article we looked at 6 different materials used for roofing shingles, but asphalt is by far the most common choice and what we will focus on here. This popularity comes from lower costs, but with manufacturing improvements its expected life has grown to 30, 50, or 75 years, with some lines even featuring lifetime warranties.
In the beginning, the shingles used wood fiber or felt to hold and shape the asphalt waterproofing material. The shingles were designed with 3 “tabs” which imitated a slate look. Later, fiberglass was substituted with dramatic performance improvements in weatherproofing, longevity and fire-resistance.

The 3-tab shingle is just a single layer, but manufacturers began to add additional layers giving the shingle more thickness which produced a better finished appearance. This design goes by several names: dimensional, laminate, or architectural.
Due to severe hail storms during the mid-1990’s, testing was developed to rate the impact resistance of asphalt shingles. The test (UL 2218) designates a class rating of 1 to 4 with 1 being the least resistant. Attaining a class 4 rating means the shingle has a 2-inch steel ball dropped multiple times on it from a height of 20 feet without any cracks produced that would allow moisture through. A tough test to pass! This does not test the shingle’s resistance to high wind speeds. That requires a different test.
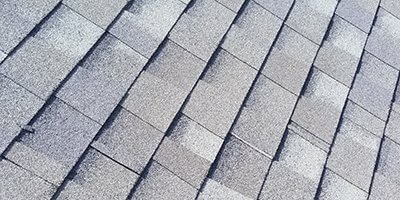
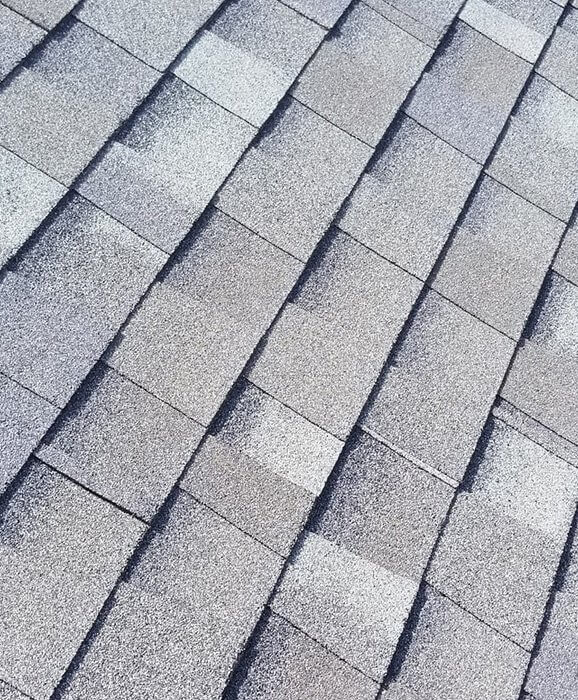
Embedded in asphalt shingles are small particles looking like small rocks. These granules are critically important to its weather resistance and they also create the color and visual appearance of the finished roof. These granules typically have a natural mineral core which is coated with a colored ceramic giving the shingle its color. Many shingles now utilize different color granules placed on shingle in such a way to create a “shadow line”. The shadow line gives visual depth and contrast to the finished roof mimicking a slate or wood appearance.
The Asphalt Roofing Manufacturers Association lists more than a dozen manufacturers so you have many lines and qualities from which to select. Here are three of the best-selling manufacturers: GAF, CertainTeed, and Owens Corning.

GAF was founded in the late 1880’s and is the largest roofing manufacturer in North America with many outlets and a large network of factory-certified contractors. In 2011 GAF, first to do so, offered a Lifetime limited warranty on all of its laminated shingles. GAF’s line of shingles called Timberline® HDZ™ are eligible for a wind warranty without a wind-speed limitation. GAF offers StrikeZone™, a strip in the nailing area designed to produce accurate nail placement and Dura Grip™, which bonds the shingle rows together locking out moisture and resisting the force of winds.

CertainTeed began in 1904 and is a major manufacturer of building products with more than 60 manufacturing facilities. Their Presidential line of asphalt shingles feature a dual-layered construction and are certified to meet UL performance standards. These carry a lifetime-limited warranty and offer the heaviest weight and widest color selection. A ten-year warranty, StreakFighter®, is given against algae stains.

Owens Corning, established in 1938, is a building materials manufacturer operating in 33 countries. They offer a line called Duration which comes with a limited lifetime warranty. To increase its gripping power, strength and durability they imbed a fabric strip in the shingle’s nail zone called SureNail® warrantied to withstand winds to 130 mph. StreakGuard™ is their warranty against growth and stains from blue-green algae. They claim that their granules are manufactured to withstand particular regional weather differences.
We don’t have space here to include details about more shingle options produced by other quality roofing manufacturers. Today there are more asphalt shingle options with superior performance and longer warranties than ever. We hope this short review helps you better understand the technology and benefits in what appears to be “just” a simple asphalt shingle.
Unless you are planning a DIY installation, we suggest you find a good local roofing contractor and have a conversation with them about the products they install. Some contractors are factory-certified to install particular brands. Some may prefer certain brands or shingle lines and some may install any brand you select.
The most important decision we believe though, is selecting the right contractor to work with on your roofing project. You can get some tips on how to select a local roofing contractor from our previous article. Choosing the best asphalt shingle with a lifetime warranty installed by the right contractor may only be a one-time decision for your home, so inform yourself well and make the right choice.
Residential roof – 6 types – Which is best?
Residential Roof types – Which works best for you?
When you are sitting in your home watching a good movie, you hopefully aren’t thinking about what is above your ceiling. And that is a good thing, because it means whatever is up there, it has been quietly doing its job protecting you from wind, sun and weather. But, if your roof is getting old, if it has been damaged, or if you are building a new house, you are likely seriously considering roofing options.
You might be thinking about different colors, styles and designs, but there is much more to consider. The type of roofing you choose will have certain characteristics that impact not only how it handles various outside weather conditions, but actually changes things inside your home. For example, the amount of heat penetration affects your electric bill. So, the roof you choose should be done with care and good information.
We offer this list of residential roof options with some strengths or disadvantages to help you decide beyond just what will look good, but which also will bring benefits to your pocketbook, house and family-life
There are many important unseen parts that are needed to build a good roof, but we won’t address those in this article. Today we will just focus on the outside visible part called the shingle. Shingles are overlapping individual items attached in various ways to the wood of the roof and that form the waterproof barrier protecting your home. Shingles come in many shapes and materials each with different performance characteristics. We will consider six types of shingles in our list today.

Asphalt
Composition:
asphalt is the main component, but it is then reinforced, typically with fiberglass, and covered with small mineral granules for durability and color
The standard design is called a “3-tab” which gives a flat look with rows and diagonal patterns. A newer design called a “dimensional shingle” gives a multi-layered look, eliminates the diagonal patterns, has a longer life and is stronger.
Strengths:
lighter in weight, lower cost, easy installation, spot repairs are simple, widely available, many color variations
Disadvantages:
high winds and large hail can damage them, temperature extremes can cause damage, cannot withstand high heat well
Metal
Composition:
steel, copper, zinc or aluminum with various paint options for color and design. The metal can be formed into a variety of shapes and sizes ranging from large sheet panels, to small over-lapping rows, to vertical strips which give a wide variety of looks to match the house design.
Strengths:
longer life-span than asphalt or wood, lightest weight, reflects sunlight keeping inside temperatures lower reducing energy use, can tolerate high heat, fireproof
Disadvantages:
noisy during precipitation, but this can be reduced with additional underlaid material, large hail can dent the surface, low insulating ability


Tile
Composition:
clay or concrete formed in many design shapes with pigment or stain infused to provide color options
Strengths:
very long-lasting, withstands high heat and long-term sun exposure, low maintenance cost, long-lasting, fireproof, insulates from heat & cold and so reduces energy usage
Disadvantages:
expensive to install, the weight is heavy, repairs are more difficult, the clay type is relatively brittle
Slate
Composition:
naturally occurring stone cut to size and shape
Strengths:
very long-lasting, withstands high heat and long-term sun exposure, not damaged by fire, wind, hail or snow, natural appearance
Disadvantages:
expensive to install, pegs used to secure them can break, very heavy weight, fewer installation companies available


Composite
Composition:
manufactured from various polymers, rubber or plastic
Strengths:
made to look like tile, slate or wood, low maintenance, long-lasting, many brands have high fire-resistance, aesthetics of other type shingles with a lower cost
Disadvantages:
smaller number of installation companies, less insulating qualities than the types they mimic, variation of quality between brands
Wood
Composition:
natural wood that is machine-cut to size and shape, typically from cedar, spruce, cypress or pine
Strengths:
rustic appearance, eco-friendly, spot repairs are possible without too much difficulty
Disadvantages:
susceptible to fire and banned by building codes in some areas, susceptible to rot in wet regions, cannot sustain long high-heat and sun exposure

You can see that there are performance differences between the shingle types and there are also significant cost differences we weren’t able to address. The region of the country in which you live and your weather may quickly eliminate some of the options, but we hope this information helps you make a better-informed decision.
We recommend that you seek out a reputable local roofing company and get their opinion on the best options for your specific situation along with pricing and installation costs. With the information in this article in your back pocket, we trust you’re now in a better position even to have conversations with potential roofing companies.
Extra Tip: Check out our article on how to select the best roofing contractor. We are heading into fall, but there is still plenty of good weather left to select your best roof type and get it installed.
Factors Determining if You Should Repair or Replace Your Roof
There is a big difference between a repair and replacement. A repair is less cost now, but there comes a point when continued repairs exceed the cost of a replacement. How do you decide what is best?
Your roof’s materials, workmanship and maintenance determines its useful life. It isn’t a good plan though, to continue to let it age until it fails.
Some roofing experts, such as at R&S Roofing, are available to do the following inspections free of charge if you would prefer a professional checking on your roof’s health. Here are factors to determine if your roof is in good condition, just needs some repairs, or should be replaced?

AGE OF THE ROOF
Most roofs were built using asphalt shingles which were designed to last 20-25 years. [If your roof was re-shingled directly over an older layer, expect them to have a shorter lifespan.] Check your records to see when your shingles were installed. If they are nearing that age, replacement often becomes the best option.
SIGNS OF A FAILURE
If a tree branch has damaged shingles or a storm blew off shingles, those are clear signs of roof damage that need attention, but there are also less noticeable signs of failure.


ATTIC
Start your inspection by taking a trip up to your attic. Using a good light, carefully inspect the inside of the roof for areas of discoloration. Leaks often occur around items that penetrate the roof or where roofs and upper-story walls meet.
Check the insulation for signs of leakage. It may be dry now, but water leaves evidence of having been present.
Inspect the wood framing for signs of sagging, dry rot, mildew or water stains. The framing supports the entire roof and unattended damage can eventually lead to total failure.
Check the wood sheathing for sagging or soft spots which may indicate water getting through the shingles, but maybe not into the attic yet.
Before you leave, turn off the light and look for pin holes of light coming through the roof.
VENTILATION
Your attic needs air movement through it to reduce humidity and moisture buildup leading to mold and wood damage. Air vents should be installed in the lower portion of the roof (or soffits) and also near the peak. If you don’t feel experienced enough in this area, a roofing professional can evaluate if the ventilation is adequate during their inspection.
Now let’s get outside and up on the roof.
On your way up the ladder look in your gutters for granules that have come off the shingles. Newly installed shingles will lose granules for a bit, but then in old age the granules will again start to come loose. Also notice if you have pieces of shingles there.
When you are walking around on the roof pay attention to its sturdiness. If you feel it sagging under you, that can be a sign of dry rot or damage from a leak.


FLASHING
Metal flashing should be installed around pipes penetrating the shingles and is sealed using rubber gaskets. Check for cracking and damage to the rubber and that the metal is laying flat. Metal flashing is also used where roof sections butt against a wall, in “valleys”, next to chimneys and around skylights. Older roofs may not use metal, but relied on an asphalt tar to seal. Either way, inspect these areas for signs of cracks, peeling and damage.
SHINGLES
Now look at the shingles. Are any missing? Are some missing corners or chunks? Are some showing cracks?
The shingles should lay flat, sealed to the row below. With age or damage, they can begin to lift, curl, cup and crack.
Remember looking for granules in the gutter? Now look at the surface of the shingles to see if there are “bald” patches where the granules are gone. Checking after a strong hail storm is important as that can also cause damage and granule loss.

WHAT NOW?
Having completed the inspection and identified any issues, the next step is determining the cost to repair them or the cost to replace the roof. This is the time to evaluate its useful life and replacement versus repair costs and an extended life.
Assuming you are not attempting a DIY, you now need to call a professional roofing contractor. See our previous article about how to choose the right contractor.
Most quality Roofers will appreciate knowledgeable clients who have done their homework because they will appreciate our expertise and professionalism, but please consider the risks before climbing around on your roof. A professional team such as ours at R&S Roofing will make a no-obligation free inspection if you prefer.
We will provide you with a detailed list of any issues we discover and repair costs. If your roof is old or the issues are more severe, we will work with you to evaluate the cost-benefit relationship between repairs or replacement.
You want your roof in good shape, but don’t want to spend too much. With an informative inspection and a detailed plan for the job, together you and an experienced, skilled Roofer can determine your best option.
How to choose the right roofing company
Have you decided it is time to replace your roof? Or, do you have roofing maintenance that needs done? Maybe you aren’t sure about the condition of your roof and would like an expert’s evaluation. Or, perhaps you’ve just come through a storm and you need some repairs and done quickly.
In these situations, finding and choosing the right roofing contractor to hire is an important task. How do you avoid the roofers who do shoddy work or worse, the “storm-chasers” running a scam? How best can you sort through roofing companies and find the right expert for your job?
Your home and its roof are very important and with a bit of effort you can select the right roofing contractor to ensure a quality job lasting for years. Here are some helpful factors in selecting the best roofing contractor.

#1 – A LOCAL BUSINESS
Begin a list of contractors that are located in your area and who have invested in a dedicated office/shop location. A local contractor is often better aware of local codes and regulations. Having an office suggests they will be in business long after the roofer who is just working out of his pickup. Visit their location and see their operation. Is it well-kept and professional or not?
#2 – REVIEWS
A contractor should have built a reputation. Find out what type reputation it is. Experience and quality work produce good reviews. Check online with the Better Business Bureau (BBB). Search Google, Angie’s List, Yelp or other review sites for the company’s rating score, but don’t stop there. Read the reviews. Valuable insights can be gained about their performance. Remember there are likely to be some negative reviews regardless. Read to see what people complained about and consider if it seems valid. It isn’t good either, if the company doesn’t have many reviews.


#3 – WARRANTY
A warranty by the contractor is a sign of good business, but it is only good as long as they remain in business. While warranties are important, there are many aspects to consider. Quality materials installed incorrectly may take years to appear and insurance likely won’t cover that claim. Some manufacturers will warranty the installation workmanship, but that might also limit your material selection and there may not be a local roofer certified in this manner. Finding an experienced local contractor using quality materials, may be the best path through the warranty maze.
#4 – MATERIAL CHOICES
There exists a wide variety of shingle options. If a roofing contractor isn’t able to offer a good variety of style and color choices that is concerning. Roof shingles dramatically affect the appearance of the house and that affects its resale value. Don’t select a contractor that overly restricts your options.


#5 – SAFETY
Asking potential contractors about their safety training and record. The work is going to be performed on your property on top of your roof. Contractors should be taking precautions regarding safety with protocols and worker training.
#6 – COMMUNICATION
Evaluating communication from the prospective contractors can be a good indicator of how things will go once you have hired them. As you build your list and research different roofing companies, keep a log of communication. Did the company provide the information you requested? Did they do it in a timely manner? Were they professional, courteous and thorough? A contractor not performing well when they are competing for being hired may be even worse after securing your work.


#7 – PRESSURE
Be prepared to resist pressure tactics to make a quick decision and sign a contract. This is especially important dealing with storm damage and insurance claims. A reliable contractor will make a thorough inspection and provide you a written quotation. Your insurance company should then be contacted. “Storm-chaser” roofers often claim to be sent by your insurance company, that they can “cover” your deductible and push you for a commitment. For less urgent projects, still resist the pressure to commit quickly to any offer.
#8 – QUOTATION & CONTRACT
Your list now includes many local companies and you’ve read ratings and reviews, you’ve seen their business locations, and communicated with them. Narrow it down to just your top picks and ask them for a quotation. Someone will come out and make an inspection and you will need to select the product they will use. They should send you a detailed estimate including: materials, warranty, timeline for completion, if a deposit is required, total cost, payment due date and payment methods. The quotation might become a contract with your signature or if a separate contract is made, confirm all terms are accurately transferred.


#9 – CREDENTIALS
Confirm your contractor has liability and workman’s compensation insurance by obtaining a certificate copy from them. An injured worker on your roof might lead to litigation for medical costs against you without insurance. Also, some regions require contractor licensing that should be confirmed.
This may seem like a lot of work, but it can be a savings in the end. Avoiding a poor-quality job by an unprofessional contractor will create a lot more work, headaches and expense.